RV SOLAR + RV GENERATOR - GET THE BEST RIG FOR BOONDOCKING - "HOW WE DO IT"!
Our first RV Solar installation had a glaring problem that I didn't realize until I researched the battery manufacturer website. Now that our solar setup is perfect, I want to run the AC anytime as well :)
In this video I show you the components we use for our solar, as well as the generator we carry so we can run anything in our camper anytime we like. The key is having the generator in a spot where you essentially forget about it until you want it.
Our Solar and Generator write-up:
* IMPORTANT NOTE * - remember, this is 'How we do it' - The equipment and notes in this writeup are merely a suggestion as to what worked well for our setup. Your mileage may vary.
Solar Gear
Renogy - 100 watt solar panels
These have been amazing from the start. I purchased 1 in 2015, another in 2016, and 2 more in 2017.
They work great and get the same amount of power in from the sun as the more expensive units do.
Suggestion: Purchase the panels without the renogy charge controller. You will want to get a programmable controller that you can set to the mfg voltage rating for your battery. (listed below)
Wiring the panels to the solar controller
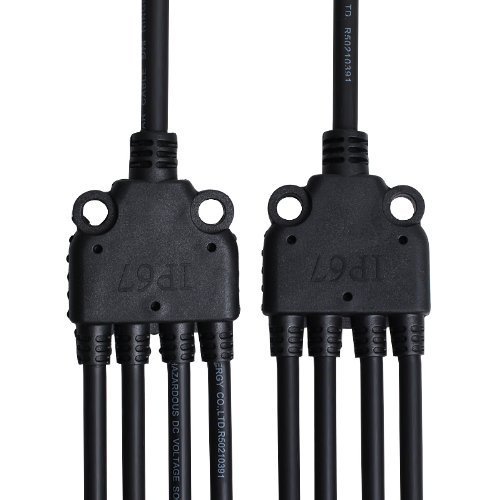
The way I did it: I wired the panels in parallel, coupling all the panels into a 4 device branch connector.
I did this to minimize any panel shading. When panels are wired in series, if a panel is shaded, it can bring the amount of power down drastically. (more than 50% in some cases).
If the panels are wired in parallel, and one of the panels is shaded, then you only lose most of that single panel power input.
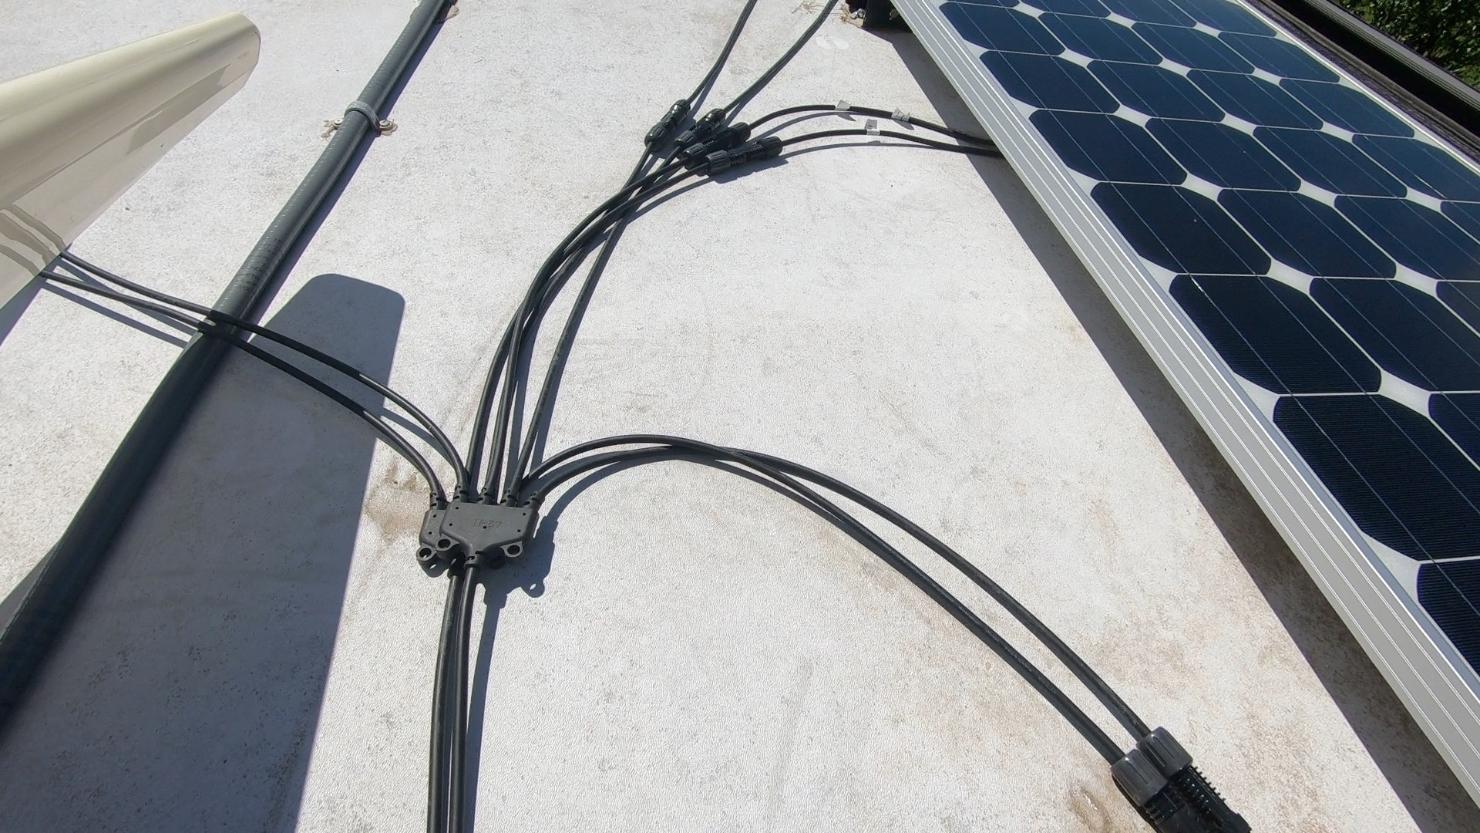
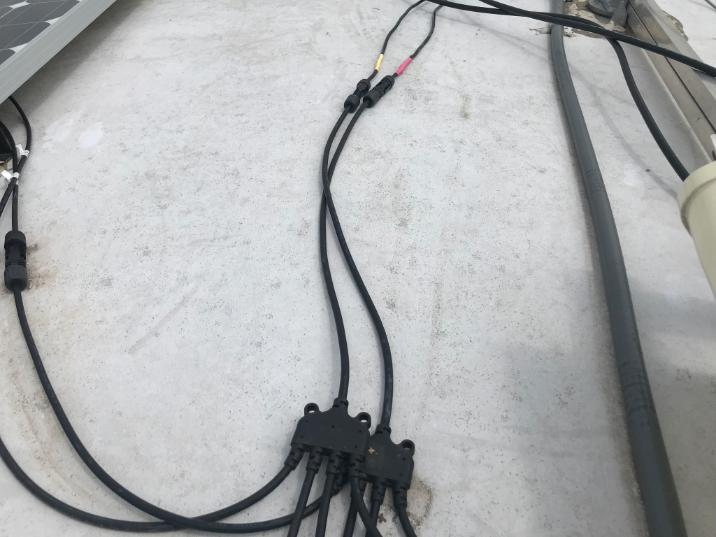
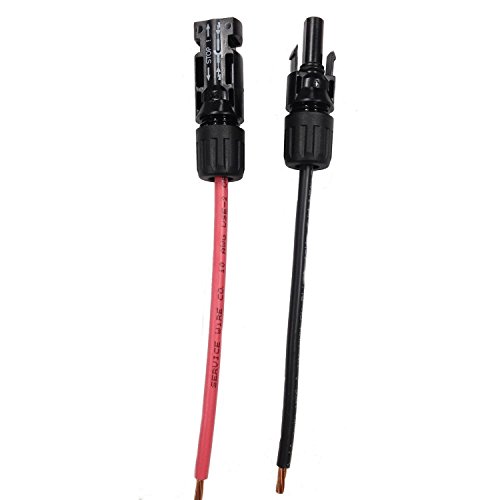
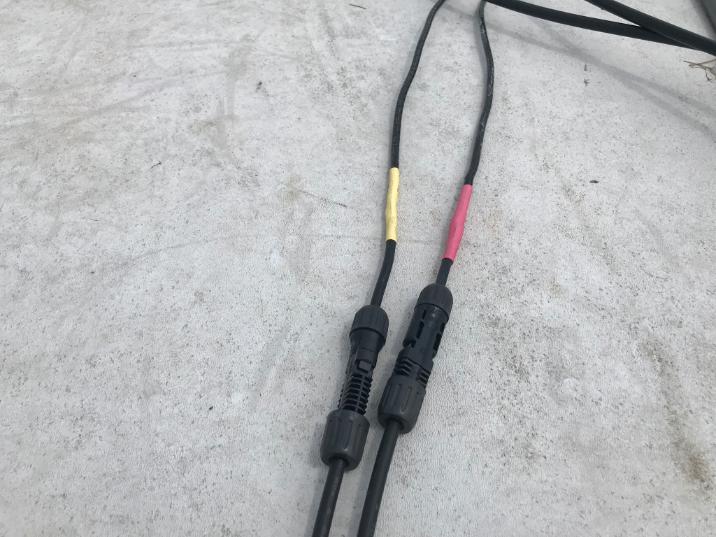
I went from the branch connector and immediately coupled the wires with larger 6AWG wire for the run from the branch connector to the solar controller.
Solar Panels - to tilt or not to tilt?
Initially, I had purchased the flat solar panel mounts and mounted the panels on the roof.
After some thought, I decided that I wanted the ability to tilt the panels to get more power. The main reason being is that I simply like to have the options available to me, plus, you do get MORE power when they are tilted.
In the winter months, the sun is much more south than directly overhead. I found that tilting the panels was usually a difference from 15 amps of power in when flat, to 22 amps in when tilted. That's pretty huge.
Now, you can pretty much gain that same power by adding another panel, but for a bit more money on the hardware, you can tilt them if you want.
If you are interested in making your own, I created some custom tilt brackets with parts from my local surplus store:
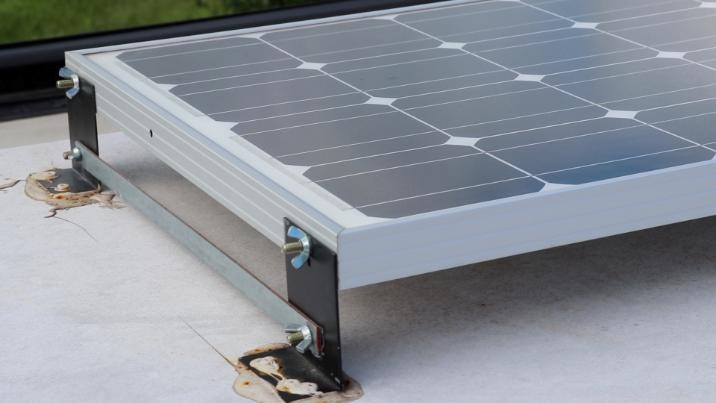
It's a pretty simple design. L brackets that have a single bolt with a wing nut, and a section of galvanized steel to prop up the panel. This design allows me to tilt the panel in either direction.
Charge Controller
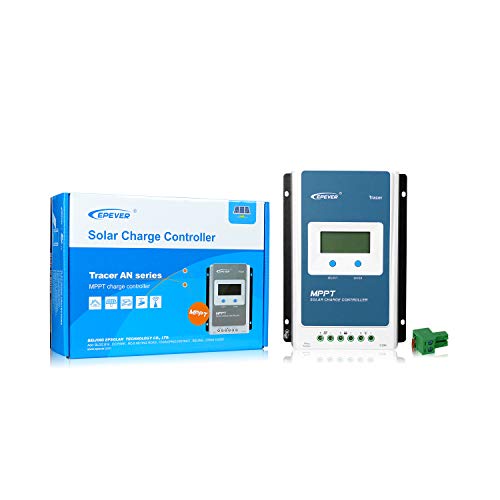
I initially used the Renogy charge controller that came with a 1 panel kit. I didn't have good results with that controller, so after research, I landed on this programmable model.
You can create a custom profile for your battery bank, and set the voltages as recommended by the battery manufacturer.
Also, the remote monitoring device is nice, and works well.
EPEVER MPPT Solar Charge Controller 40A 12V/24V Upgrade Tracer4210AN + Remote Meter MT50 Monitor for Solar Panel Charge Controller Regulator System with LCD Display (Tracer4210AN + MT50)
1500W Pure Sine Wave Inverter
This was a GREAT purchase. It works well, and has really clean power. When running appliances in the camper, you can't tell they are running on an inverter.
It runs everything in the camper except for the AC unit.
- Microwave
- Fridge on full ac power (gas option turned off)
- Instant Pot
- TV
This is my third try at a large inverter. The first, a 1000 watt inverter wasn't enough power, second 2500 watt worked well, but the HUM drove me nuts.
Installation Suggestion:
Install the inverter close to the batteries. The inverter will come with a length of wire that should work as long as you use that length or shorten the wire.
Use the adapter listed on the right to plug your RV into the inverter to power the rig.
The Generator
I purchased the generator in 2017, and I love having it. The key is to have it in a spot that will not get in the way, so you essentially forget you have it until you want to use it.
I found the best place for it is above the LP tanks, mounted on the tongue.
The generator itself weighs in around 90 lbs. The mount, probably another 15-20lbs, so it doesn't throw off the tongue weight too much.
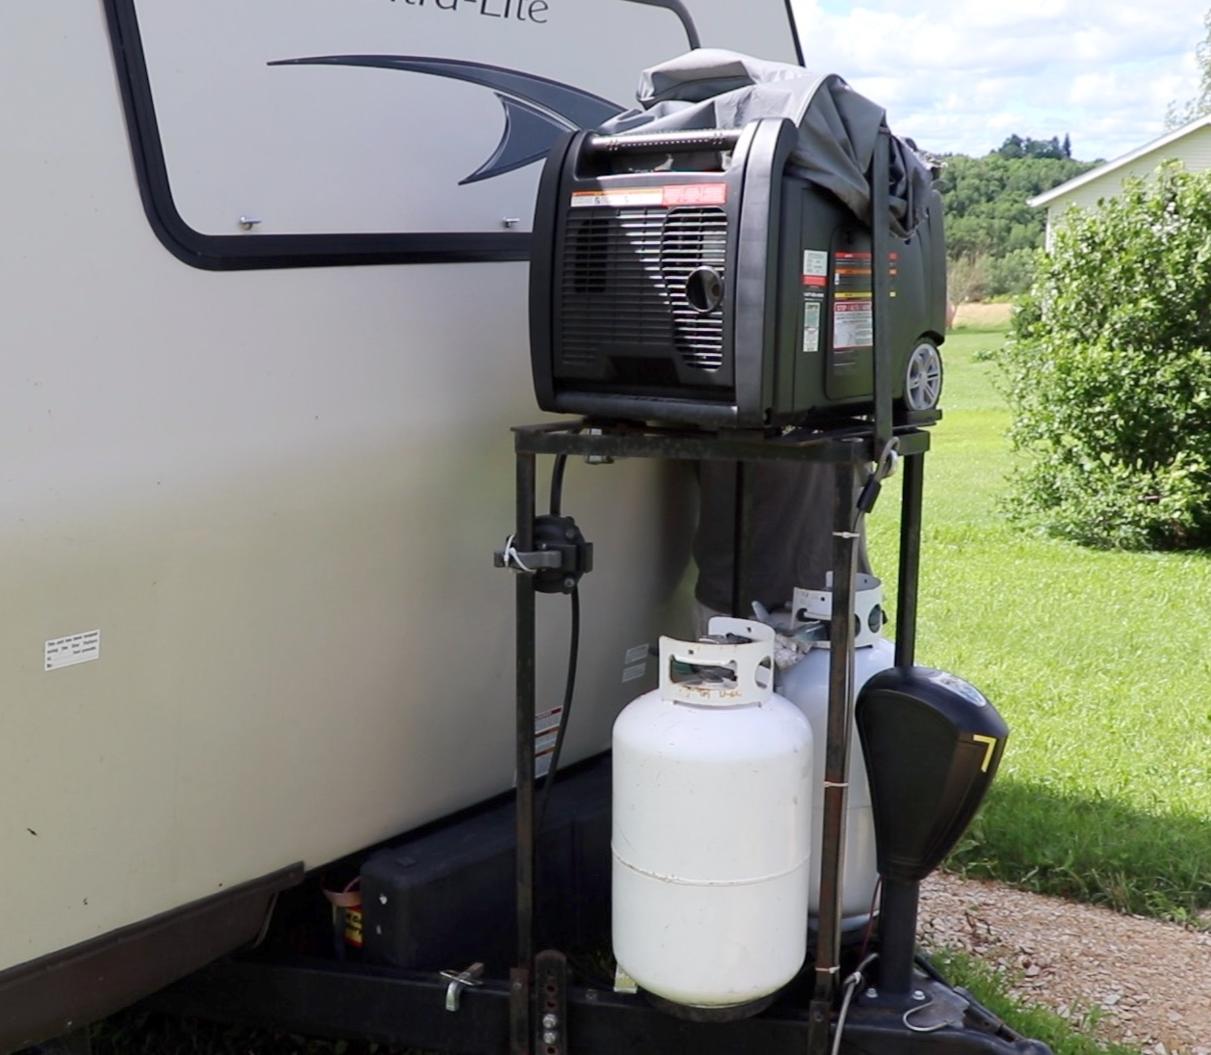
This was a great purchase, and perfect for the RV life IMHO. It has plenty of power, and is ready for propane right from the factory.
I have never put gas in my generator. I always run it on propane.
The main reason is so that it doesn't stink. I can bring this gen into the van, or into the camper and not have to worry about smelly gas fumes.
It comes with the propane tank hookup hose, so you can disconnect one of your tanks and hook up your gen directly to a tank.
I piped it directly into the propane line so it's always ready to use.
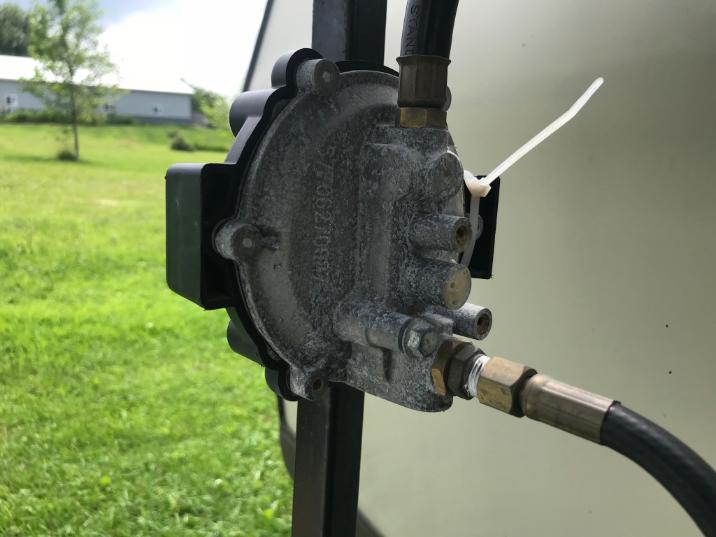
The pic above is the regulator that came with the generator. I replace the LP hookup connector on the regulator with a hose that runs to a shutoff valve. (lower right portion of the regulator)
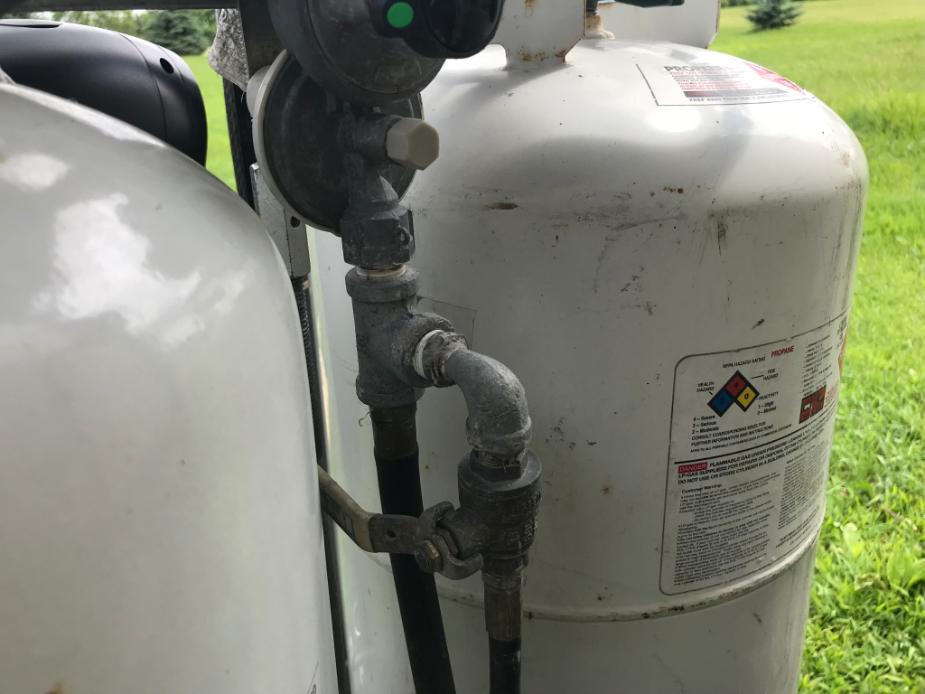
I added the 3 way `T` connector ater the RV regulator and used a 90 elbow, followed by a ball valve for a shut off. I normally travel with the ball valve closed, and open it only when I want to run the gen.
Champion Weather-Resistant Storage Cover for 2800-Watt or Higher Inverter Generators
( I have the champion logo pointing back toward the camper so I don't advertise a generator sitting there)
Get Nick's Tips Straight To Your Email!
Doing videos is a lot of work :) As you probably already know, I (Nick) tend to do things a bit different, thinking outside the box.
If this article was helpful, and you want to know right away when I found something crazy awesome, sign up below as I'll use that to share great, quick tips with you.
Talk to you soon!
Questions? Leave a comment on YT and I'll do my best to help.
WELCOME
Glad to have you with us!
FOLLOW US
Wecanexploreit is a participant in the Amazon Services LLC Associates Program, an affiliate advertising program designed to provide a means for sites to earn advertising fees by advertising and linking to amazon.com
Disclosure: Some of the links in our website are affiliate links, meaning, at no additional cost to you, we may earn a commission if you click through and make a purchase.


